The post 12 DIY Kitchen Trash Cabinets appeared first on Citchen.
]]>DIY Kitchen Trash Cabinets are a smart way to keep your kitchen clean and organized. They hide trash bins, save floor space, and make your kitchen look neater. Whether you have a small or large kitchen, these simple ideas can help you build a practical cabinet that fits your needs and style.
DIY Kitchen Trash Cabinets
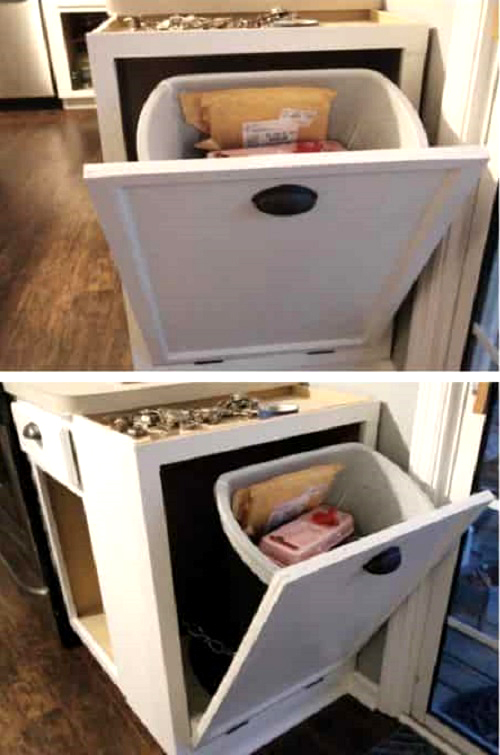
1. Hidden Trash Can Cabinet
hgtv
Keep your trash can out of sight with this DIY Hidden Trash Can Cabinet by HGTV. It looks like a cabinet and, therefore, would not ruin your kitchen’s overall appearance. Just build a cabinet frame and place your trash can inside it.
2. Cabinet Pull Trash Can
charlestoncrafted
Tired of the foul smell from the trash can? Make this Cabinet Pull Trash Can by Charleston Crafted by building a wooden cabinet frame that can incorporate the trash can. Use the cabinet top to organize things.
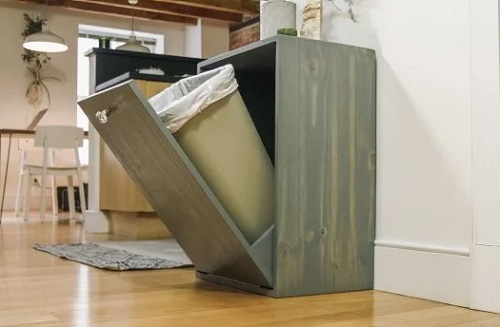
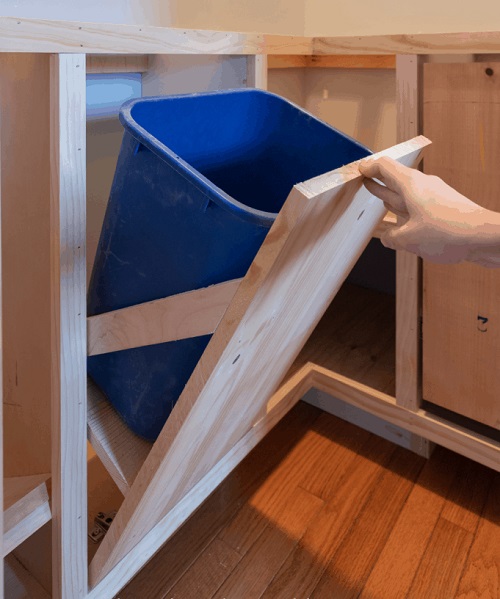
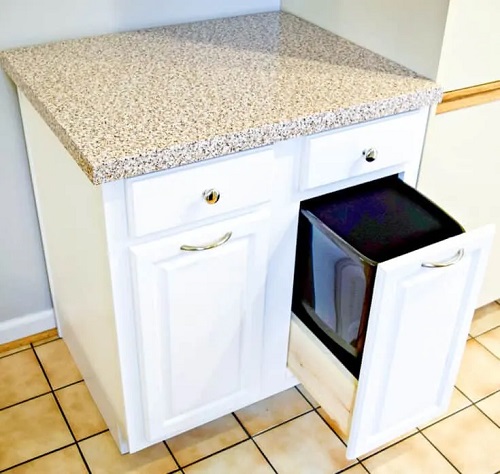
3. Custom Tilt-Out Trash Cabinet
justagirlandherblog
Hide everything that makes your kitchen messy, even the trash can, with this Custom Tilt-Out Trash Can Cabinet by Abby Organizes. This DIY item easily hides your trash can while trapping the odor in.
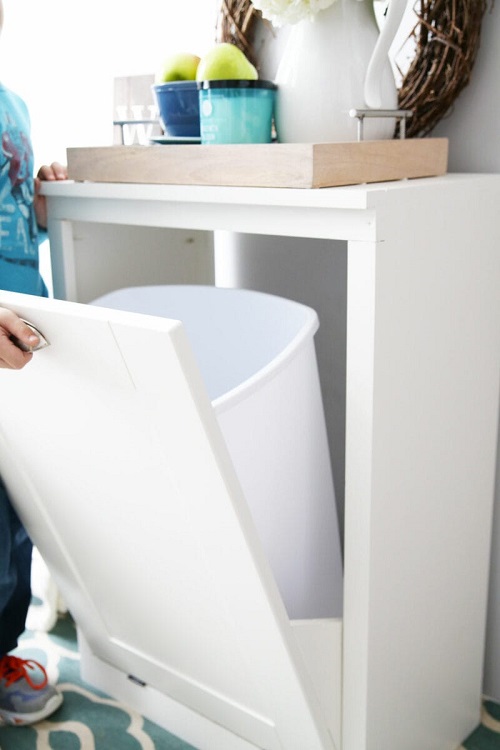
4. DIY Tilt-Out Cabinet
handmadeweekly
Designing your kitchen? Don’t forget to try out this DIY Tilt-Out Cabinet by Handmade Weekly. It’s a great way to keep your kitchen neat and clean while not missing anything important.
5. DIY Pull-Out Trash Can
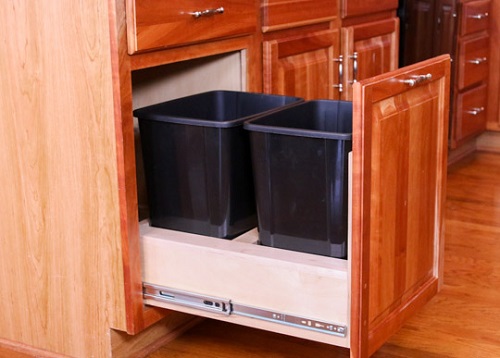
fix this build that
Make access to the trash can a lot easier with this DIY Pull-Out Trash Can by Fix This Build That. All you need to do is fix the trash can to one of the empty cabinets and just pull it out, throw trash, and be done.
6. Tilt Out Trash Bin
kregtool
If you feel that the trash can should be hidden, then just hide it with this Tilt Out Trash Bin by Kreg. It features a big and strong wooden cabinet with space for a trash can. It also has a drawer for storage.
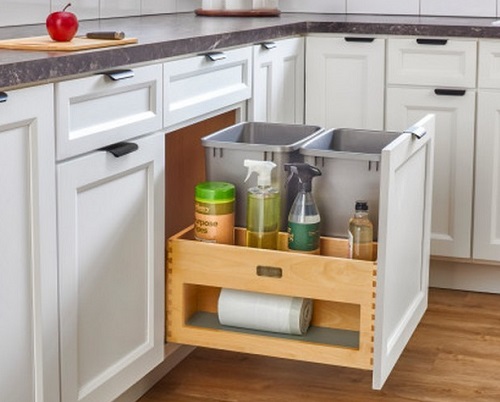
7. DIY Pull-Out Trash And Recycling Bin
hometalk
Keep one cabinet empty to ensure your kitchen feels fresh to breathe, and use that space for this DIY Pull-Out Trash and Recycling Bin by Home Talk. This keeps your kitchen organized and well-maintained.
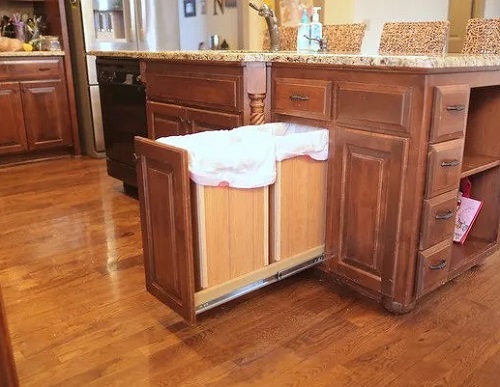
8. Pull-Out Trash Can Cabinet
lindiandruss
Keep everything related to trash in one place with this Pull-Out Trash Can Cabinet by Lindi & Russ, featuring two different cabinets with trash cans inside. The empty surface of the cabinet can also be used for decor.
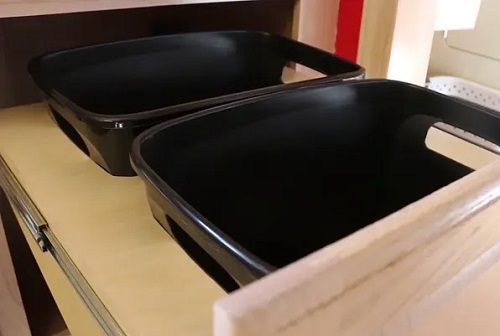
9. Pull Out Trash Can In A Cabinet
woodworkerexpress
No need to move here and there to grab cleaning items. Install this Oull Out Trash Can In A Cabinet by Woodworker Express and fix your trash can cleaning essentials in one place.
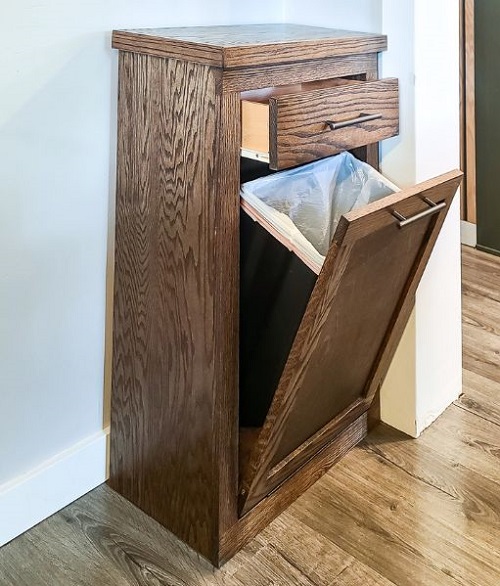
10. DIY Trash Can Cabinet
Andrew Reuter
If you have a toddler, you must hide a trash can, as they like to check everything. Use this DIY Trash Can Cabinet by Andrew Reuter and keep your kids safe from touching dirty items.
11. Hidden Trash And Recycle Bins

chatfieldcourt
Make your kitchen better with useful and smart DIYs like this Hidden Trash And Recycle Bins by Chat Field Court, which help to keep the trash can out of sight and lock in the odor.
12. Pallet Kitchen Trash Can Holder

easypalletideas
Wondering how to use the pallets? Turn them into this Pallet Kitchen Trash Can Holder by Easy Pallet Ideas with a little hard work. You can paint the pallet if you don’t like the woody finish.
The post 12 DIY Kitchen Trash Cabinets appeared first on Citchen.
]]>